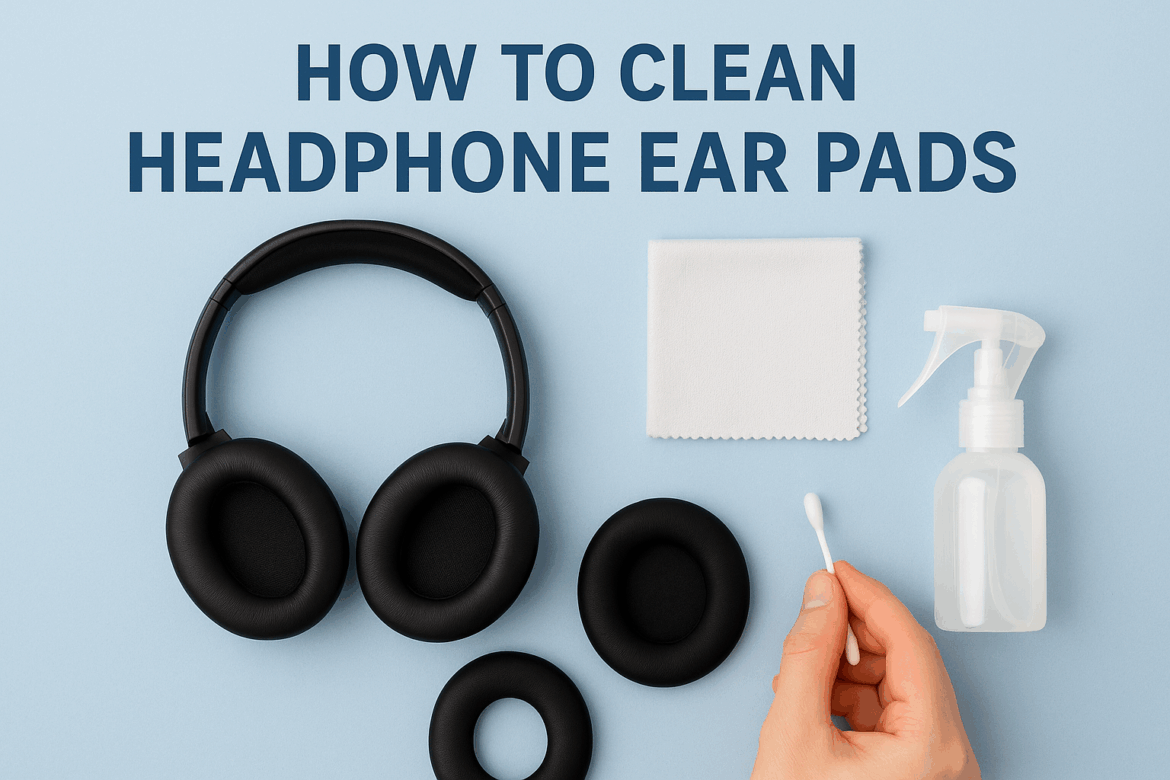
Kā tīrīt austiņu ausu spilventiņus?
Skaņai piemīt iekšējs valdzinājums, simfonija, kas rezonē mūsos, ko ēterā nes mūsu mīļotie austiņasTomēr, ļaujoties šīm dzirdes pieredzēm, ausu spilventiņi — spilventiņi, kas apņem mūsu ausis — neizbēgami nes mūsu piedzīvojumu pēdas. Austiņu ausu spilventiņu tīrīšana nav tikai higiēnas uzturēšana; tas ir rituāls, kas atjauno skaidrību jūsu skaņas ainavā. Šajā ceļvedī mēs dodamies ceļojumā, lai attīrītu šos skaņas sargus, nodrošinot, ka tie paliek tikpat neskarti kā melodijas, ko tie sniedz.
Austiņu ausu spilventiņu tīrīšanas nozīmes izpratne
Austiņu ausu spilventiņi ir kā audekls, kas savāc jūsu ikdienas dzīves pārpalikumus. Sviedri, eļļas, netīrumi un pat laika niecīgā čukstēšana atstāj savas pēdas, samazinot skaņas spilgtumu. Regulāra tīrīšana ne tikai pagarina austiņu kalpošanas laiku, bet arī uzlabo klausīšanās pieredzi, piedāvājot tīrāku un ieskaujošāku skaņu.
Kāpēc tīrīt austiņu ausu spilventiņus?
-
HigiēnaAusu spilventiņi nonāk tiešā saskarē ar ādu, padarot tos pakļautus baktēriju un netīrumu uzkrāšanai, kas var izraisīt ādas kairinājumu vai infekcijas.
-
Skaņas kvalitāteNetīrumi un eļļas var ietekmēt ausu spilventiņu materiālu, potenciāli mainot skaņas kvalitāti, apslāpējot vai kropļojot audio.
-
IlgmūžībaRegulāra apkope novērš nodilumu, pagarinot austiņu kalpošanas laiku.
Sagatavošanās: instrumentu savākšana
Pirms sākat šo attīrīšanas rituālu, sagatavojiet nepieciešamos rīkus, lai nodrošinātu rūpīgu un efektīvu procesu. Šeit ir tabula ar detalizētu informāciju par to, kas jums būs nepieciešams:
| Instruments/Materiāls | Mērķis |
|---|---|
| Maigs mazgāšanas līdzeklis/ziepes | Attīra un noņem eļļas un netīrumus |
| Silts ūdens | Atšķaida mazgāšanas līdzekli un atbrīvo netīrumus |
| Mikrošķiedras audums | Maigi noslauka un nosusina ausu spilventiņus |
| Vates kociņi | Sasniedz spraugas un detalizētas vietas |
| Berzes spirts | Dezinficē un noņem noturīgus traipus |
| Maza bļoda | Uztur tīrīšanas šķīdumu |
Soli pa solim sniegta instrukcija austiņu ausu spilventiņu tīrīšanai
1. Ausu spilventiņu noņemšana
Ar maigu pieskārienu sāciet, noņemot austiņu spilventiņus. Šis solis ir ļoti svarīgs, jo tas ļauj rūpīgi notīrīt katru komponentu, nebojājot elektroniku. Lielāko daļu ausu spilventiņu var savīt vai noraut, taču konkrētus norādījumus skatiet austiņu lietošanas instrukcijā.
2. Tīrīšanas šķīduma pagatavošana
Mazā bļodā sajauciet dažus pilienus maiga mazgāšanas līdzekļa ar siltu ūdeni. Maisiet, līdz šķīdums ir viendabīgs, radot maigu, bet efektīvu tīrīšanas līdzekli, kas nekaitēs jūsu ausu spilventiņu materiāliem.
3. Ausu spilventiņu tīrīšana
Iemērciet mikrošķiedras drānu ziepjūdenī, pārliecinoties, ka tā ir mitra, bet ne izmirkusi. Viegli noslaukiet ausu spilventiņu virsmu, izmantojot apļveida kustības, lai noņemtu netīrumus un eļļas. Pievērsiet īpašu uzmanību visām šuvēm vai krokām, kur mēdz uzkrāties netīrumi. Spēcīgu traipu gadījumā šauru vietu tīrīšanai var izmantot šķīdumā iemērktu vates tamponu.
4. Dezinfekcija ar spirtu
Kad redzamie netīrumi ir noņemti, viegli samitriniet vates tamponu ar spirtu un viegli uzspiediet to uz ausu spilventiņiem. Šis solis ne tikai dezinficē virsmu, bet arī palīdz noņemt atlikušos lipīgos atlikumus. Esiet uzmanīgi, lai materiālus nepārmērcētu, jo tas var tos sabojāt.
5. Ausu spilventiņu žāvēšana
Pēc tīrīšanas rituāla ļaujiet ausu spilventiņiem pilnībā nožūt. Novietojiet tos uz tīra, sausa dvieļa, pārliecinoties, ka tie nav pakļauti tiešiem saules stariem vai siltuma avotiem, kas var deformēt vai bojāt materiālu. Šeit galvenais ir pacietība, jo, priekšlaicīgi uzliekot tos atpakaļ uz austiņām, var uzkrāties mitrums, kas var radīt problēmas.
6. Ausu spilventiņu uzlikšana atpakaļ
Kad ausu spilventiņi ir nožuvuši, piestipriniet tos atpakaļ austiņām. Ieklausieties klikšķī vai sajūtiet ciešo piegulšanu, kas nozīmē, ka tie ir droši nostiprināti. Jūsu austiņas tagad ir atjaunotas un gatavas atkal nodrošināt kristāldzidru skaņu.
Dažādu veidu ausu spilventiņu kopšana
Austiņu ausu spilventiņi ir pieejami no dažādiem materiāliem, un katram no tiem nepieciešama īpaša uzmanība. Izpētīsim dažādu ausu spilventiņu veidu kopšanas nianses.
1. Ādas ausu spilventiņi
Ādai ar savu grezno sajūtu ir nepieciešams maigs pieskāriens. Izmantojiet tikai vissaudzīgākos mazgāšanas līdzekļus un izvairieties no pārmērīga mitruma, jo tas var izraisīt ādas plaisāšanu. Lai saglabātu tās elastību un spīdumu, laiku pa laikam var lietot īpašu ādas kondicionieri.
2. Putu un auduma ausu spilventiņi
Putuplasta un auduma ausu spilventiņi ir piedodošāki, taču tiem joprojām ir nepieciešama kopšana. Pēc tīrīšanas pārliecinieties, ka tie ir rūpīgi izžāvēti, lai novērstu pelējuma veidošanos. Auduma spilventiņus laiku pa laikam var viegli izsūkt ar putekļsūcēju, lai noņemtu putekļus un gružus.
3. Atmiņas putu ausu spilventiņi
Memory foam putas ir jutīgas pret spēcīgām ķīmiskām vielām. Izmantojiet maigas ziepes un uzmanieties, lai tīrīšanas laikā putas pārāk nesaspiestu, saglabājot to unikālo formu un komfortu.
Bieži sastopamo problēmu novēršana
Tīrīšanas simfonijā var rasties disonanse. Šeit ir dažas bieži sastopamas problēmas un to risinājumi:
-
SmaržaNoturīgas smakas var saglabāties pat pēc tīrīšanas. Neliels cepamās sodas daudzums, kas atstāts uz spilventiņiem pa nakti, var absorbēt nevēlamas smakas.
-
TraipiNoturīgu traipu gadījumā viegli uzklājama cepamās sodas un ūdens pasta bieži vien var novērst krāsas izmaiņas, nebojājot materiālu.
-
Brīva piegriezumaJa pēc atkārtotas uzlikšanas ausu spilventiņi šķiet vaļīgi, pārliecinieties, vai tie ir pareizi izlīdzināti. Laika gaitā spilventiņi var zaudēt elastību, un tādā gadījumā tie var būt jānomaina.
Secinājums: harmoniska klausīšanās pieredze
Austiņu ausu spilventiņu tīrīšana ir vairāk nekā tikai uzdevums; tā ir godbijība pret skaņas mākslu. Pateicoties rūpīgai kopšanai, ausu spilventiņi kļūst par simfoniskā brīnuma kanāliem, saglabājot katras nots un ritma tīrību. Iekļaujot šo rituālu savā rutīnā, jūs nodrošināt, ka austiņas turpina sniegt jums serenādes ar skaidrību un dziļumu, ko spēj sniegt tikai labi uzturēts instruments.
Skaņas pasaulē, kur katra detaļa ir svarīga, ļaujiet savām austiņām dziedāt ar spožumu, kura dēļ tās ir radītas. Izbaudiet rituālu, un lai jūsu dzirdes piedzīvojumi vienmēr ir harmoniski.
Pēdējoreiz atjaunināts 2025. gada 12. septembrī
